The secret to achieving the perfect winged eyeliner has long been a beauty enigma that many have struggled to crack. As a signature look that exudes confidence and glamour, mastering the art of creating flawless winged eyeliner can seem like a daunting task. But fear not, for with the right tools, technique, and a little patience, you too can unlock the key to achieving that coveted cat-eye flick. In this article, we will guide you through the step-by-step process of creating a perfect winged eyeliner that will have heads turning and eyes admiring.
Tips for achieving a flawless winged eyeliner look
Creating a flawless winged eyeliner look can be a daunting task, but with the right tips and techniques, you can achieve that perfect cat-eye every time. Here are some expert suggestions to help you master the art of winged eyeliner:
- Start with a clean canvas: Make sure your eyelids are clean and free of any oil or makeup residue before applying your eyeliner. This will help the product glide on smoothly and prevent smudging.
- Use the right tools: Invest in a high-quality eyeliner pen or brush to ensure precision and control. Gel or liquid eyeliners are great for creating sharp, defined wings.
- Map out your wing: Before drawing on your wing, use a small piece of tape or an angled brush to outline the shape you want. This will help guide your hand and create a symmetrical wing on both eyes.
- Practice makes perfect: Don’t get discouraged if your first few attempts at winged eyeliner aren’t perfect. Practice makes perfect, so keep trying and experimenting until you find a technique that works for you.
Choosing the right eyeliner product and tools
When it comes to creating the perfect winged eyeliner look, is crucial. With so many options available in the market, it can be overwhelming to decide which one will work best for you. Here are some tips to help you make the right choice:
- Gel Eyeliner: Perfect for creating sharp, precise lines. Use with a thin angled brush for maximum control.
- Liquid Eyeliner: Ideal for a bold, intense look. The fine brush allows for clean lines, but it takes practice to master.
- Pencil Eyeliner: Great for a softer, smudged look. Can also be used on the waterline for added definition.
When selecting tools for applying eyeliner, consider investing in a good quality eyeliner brush or pen. A fine tip will allow for more precision and control, while a smudger on the other end can help soften and blend the lines for a seamless look. Remember to always start with a clean, dry canvas and experiment with different techniques to find what works best for you.
Step-by-step guide to create the perfect winged eyeliner
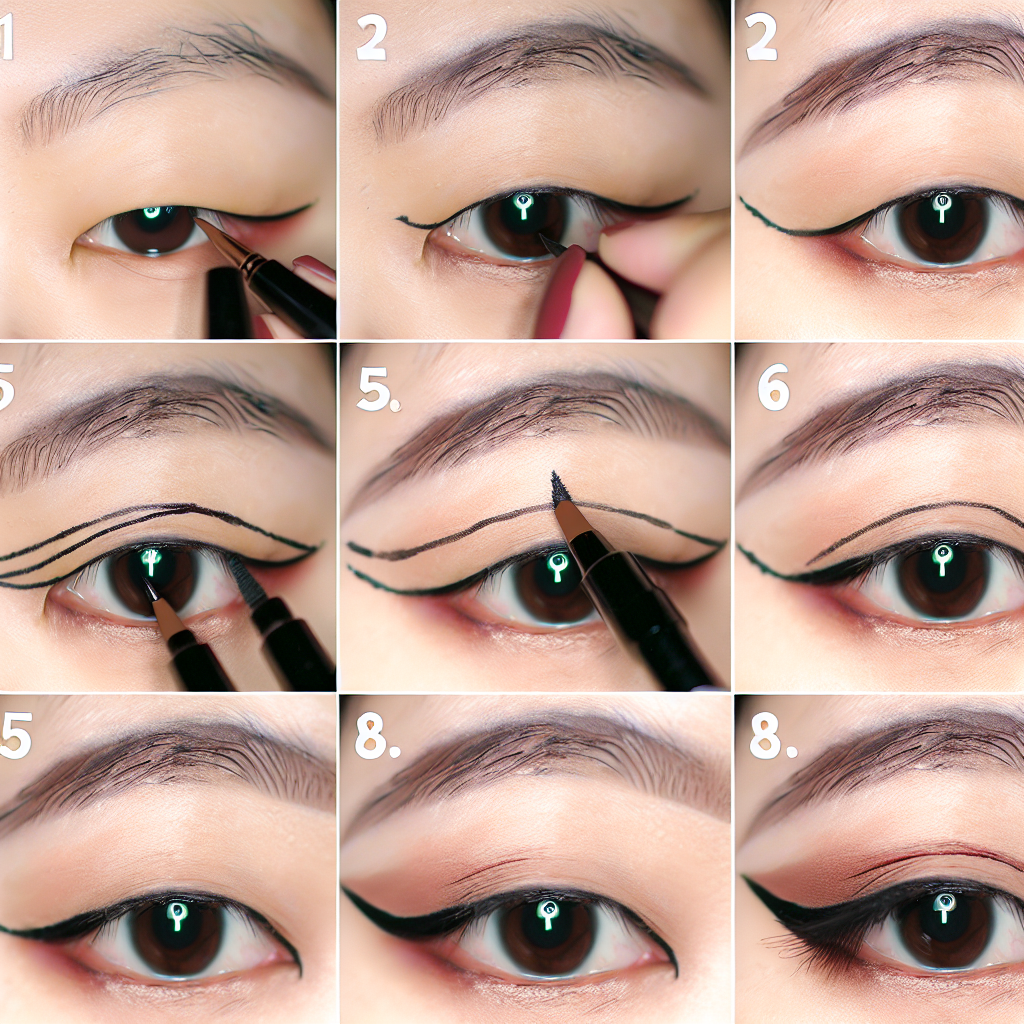
Creating the perfect winged eyeliner can seem like a daunting task, but with a little practice and the right technique, you’ll be able to master this classic look in no time. Follow these steps to achieve flawless winged eyeliner every time:
Start by priming your eyelids to ensure that your eyeliner stays in place all day. This will also help create a smooth base for the eyeliner application.
Next, using a liquid eyeliner, draw a thin line along your upper lash line, starting from the inner corner of your eye and working your way outwards. This will serve as the base for your wing.
To create the wing, angle your eyeliner brush from the outer corner of your eye towards the end of your eyebrow. Lightly draw a line following this angle, and then connect it back to the original line along your upper lash line.
Fill in the wing with your eyeliner, making sure to keep the line clean and sharp. Use short strokes to build up the intensity of the wing, and then clean up any mistakes with a cotton swab dipped in makeup remover. Finish off the look with a coat of mascara to make your eyes pop.
By following these simple steps, you’ll be able to create the perfect winged eyeliner look that complements any makeup style or outfit. With a little practice, you’ll be winging it like a pro in no time!
Avoiding common mistakes when applying winged eyeliner
One common mistake when applying winged eyeliner is not starting with a clean canvas. Make sure to thoroughly cleanse your eyelids before beginning the application process to ensure a smooth and long-lasting finish. Another mistake to avoid is using the wrong tools. Invest in a good quality, fine-tipped eyeliner brush or pen to achieve precise lines and a sharp wing.
Avoiding the temptation to rush is essential when creating the perfect winged eyeliner. Take your time and work in small, deliberate strokes to build up the desired shape and thickness. Additionally, be cautious of not overextending the wing. A common error is making the wing too long, which can drag down the eyes and create a droopy appearance. Aim for a clean, crisp flick that lifts and elongates the eyes.
To prevent smudging and smearing throughout the day, consider setting your winged eyeliner with a translucent powder. This will help lock the product in place and prevent it from transferring onto the eyelid. Finally, practice makes perfect when it comes to mastering winged eyeliner. Don’t get discouraged if your first attempts aren’t flawless – keep practicing and experimenting with different techniques until you find what works best for you. In conclusion, mastering the art of creating a perfect winged eyeliner takes time, patience, and practice. With the right tools and techniques, you can achieve flawless wings that will make your eyes pop and elevate your overall makeup look. So don’t be afraid to experiment, embrace mistakes as learning opportunities, and most importantly, have fun with it! Remember, beauty is a form of self-expression, so let your winged eyeliner be your canvas to showcase your unique style and flair. Go forth and wing it with confidence!